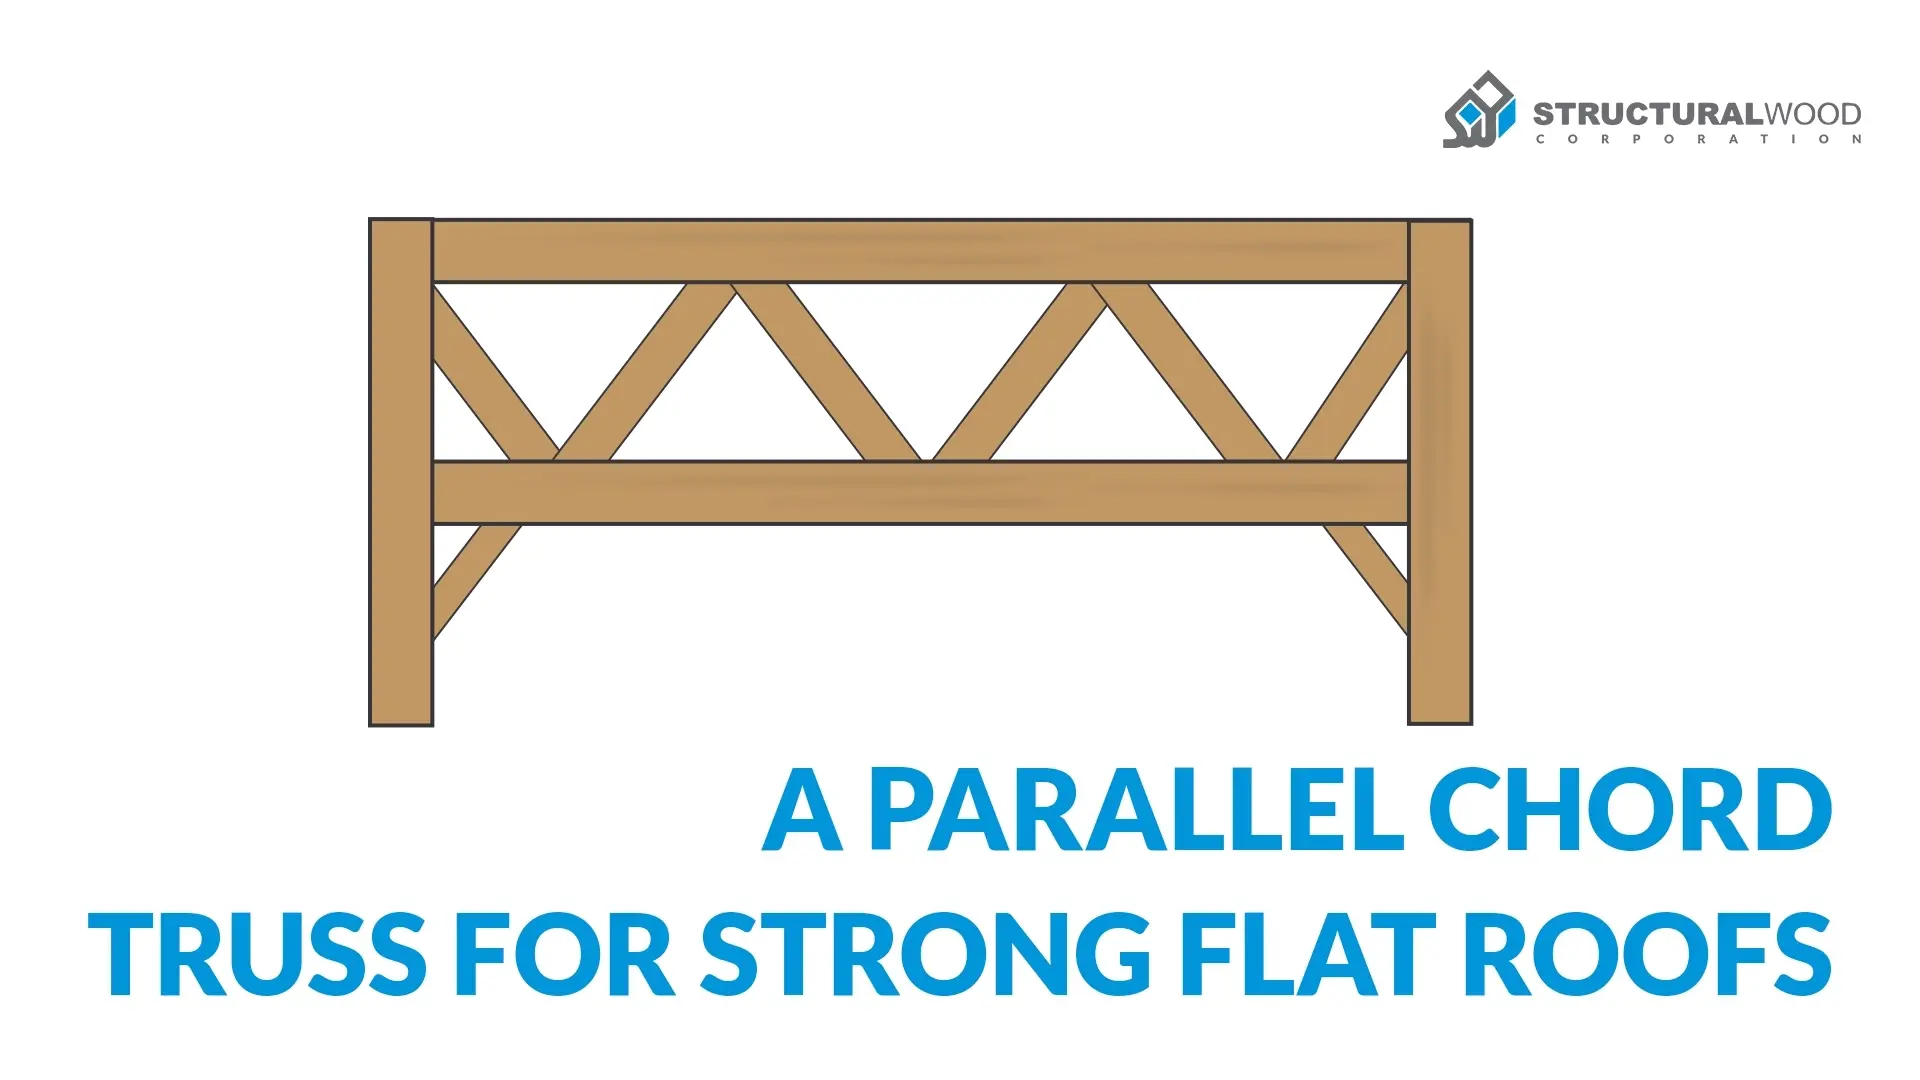
Looking for a roof solution that spans wide and keeps your ceiling clear for pipes and wiring?
A parallel chord truss could be your answer.
It lets you carry heavy loads and leave the underside open for plumbing, wiring, or even a bonus storage loft.
In this guide, you will find simple design pointers, money-saving insights, clear step-by-step build advice, and expert tricks to avoid the headaches that slow most projects.
Ready to see how a parallel chord truss can turn your flat roof into a strong, open space? Let’s get started.
If you’re new to truss systems, check out our beginner’s guide on the basics of roof trusses for a quick primer before we get technical.
Disclaimer: This guide covers detailed steps and calculators. Before you build, always consult a licensed structural engineer and follow local building codes, especially for load calculations and when using any truss sizing tool. For custom designs or a professional review, please contact us.
What Is a Parallel Chord Truss?
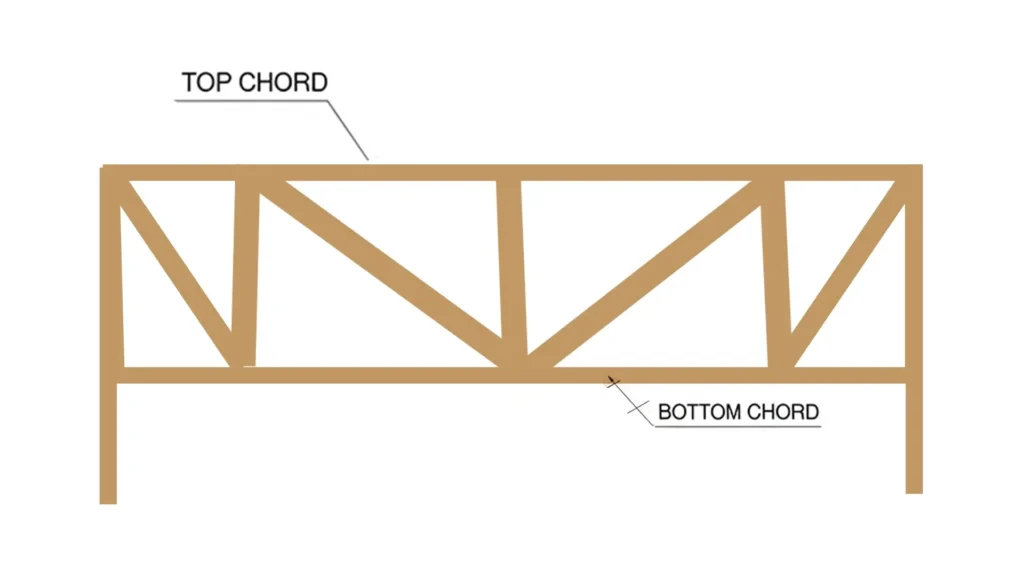
A parallel chord truss is a roof frame where the top and bottom members run in parallel lines.
Instead of forming a triangular shape, both chords stay the same depth from end to end. This design creates a flat or gently sloping top surface, leaving the underside open and clear.
Parallel chord trusses carry weight just as well as common trusses, but give you an unobstructed space below. That makes them perfect for flat roofs, bonus storage lofts, or ceiling cavities that hide plumbing, electrical runs, or HVAC ducts.
Insider Tip: Builders often choose parallel chord trusses when they need a clean ceiling plane without bulky web members. This approach can speed up the installation of mechanical systems and simplify later maintenance.
How Does a Parallel Chord Truss Work?
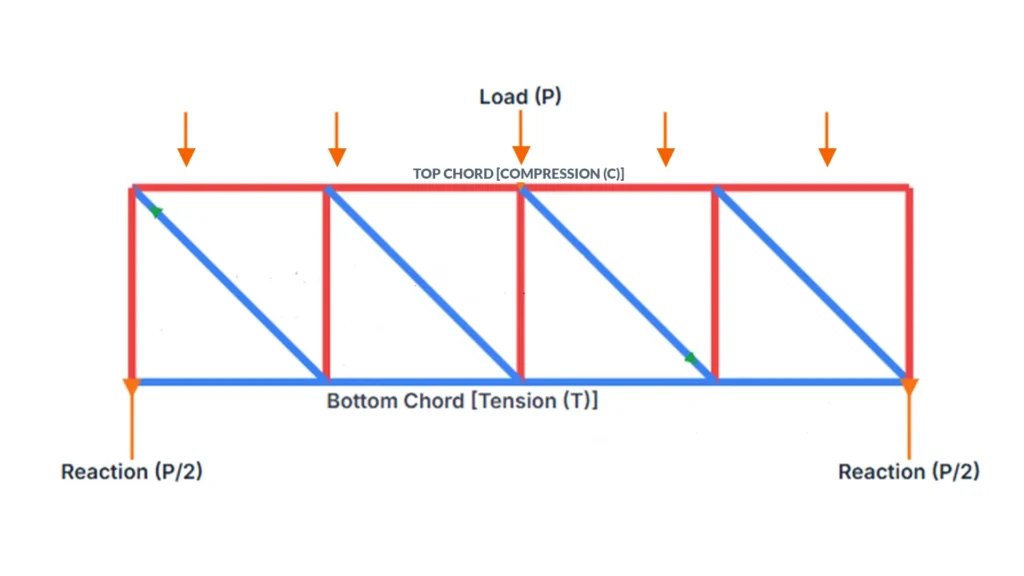
At its core, a parallel chord truss transfers roof loads through straight top and bottom members without a peak. When weight presses down on the top chord, internal web members channel those forces back to the supports at each end. The bottom chord then resists the tension, keeping the entire frame stable and strong.
This layout spreads loads evenly along the full length of the truss. With both chords staying level, you avoid sloping ceilings and bulky diagonal webs that get in the way. That means pipes, wires, and ducts can run straight through the open space below without extra framing or cutting.
Did You Know? Even though parallel chord trusses look simple, the exact placement and angle of the web members make all the difference in handling heavy loads. Precision in design and assembly ensures your truss carries weight safely across long spans.
Types of Parallel Chord Trusses
Parallel chord trusses come in several styles based on plate connection and material choice. Picking the right type helps you match your strength needs and budget.
Nail‑Plate Trusses
These use metal plates pressed into wood members for fast assembly. They are common for residential projects because of low material cost and quick factory fabrication.
Bolt‑Plate and Welded Trusses
Steel trusses often use bolted or welded plate connections. They offer higher strength and longer spans with slimmer profiles. Wood parallel chord trusses cannot match these lengths without growing too deep.
Welded Plate Trusses
Steel plates are welded directly to the top and bottom chords and to the web members. This creates a joint so solid that nothing ever shifts. These trusses work best when you need to span large open areas without any supports in the middle.
Picture a gym or airport hangar with no columns blocking the view. The thin steel members leave the ceiling clear so you can use the entire space below without bulky beams in the way.
Wood vs Steel Parallel Chord Truss
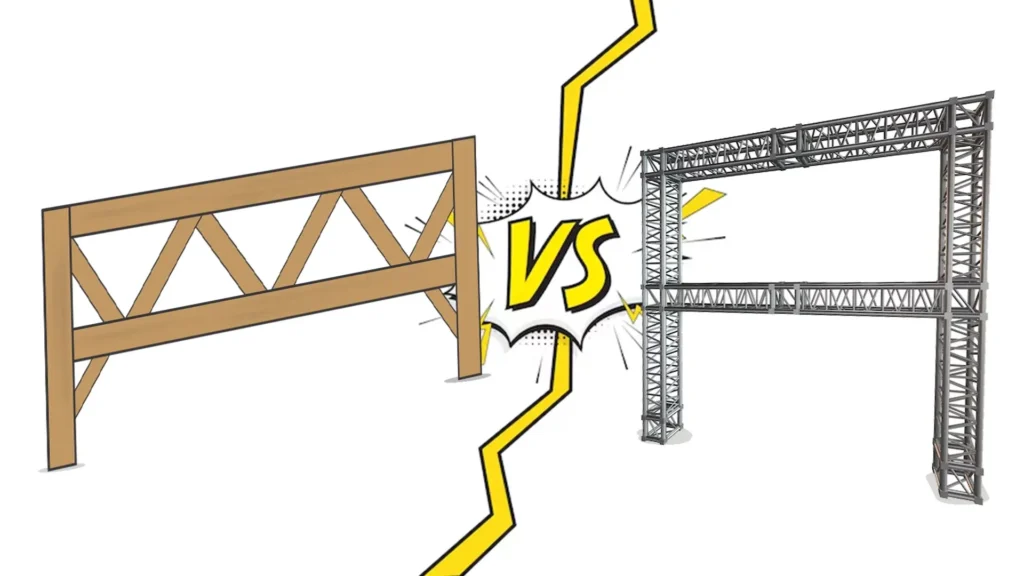
- Wood: Wood trusses use familiar materials that you can find at any lumber yard. You can cut and adjust the members right on site with basic tools. They cost less up front and work well for roofs spanning up to around thirty feet. If you go beyond that, the truss depth must grow, so you’ll end up with taller frames downstairs.
- Steel: Steel trusses cost more for materials but give you a lot of strength in a slim package. They span long distances with no extra supports and carry heavy loads easily. Because the members stay thin, you get more usable space below. Installation moves fast once the parts arrive, ready to bolt or weld in place.
Insight: Builders use wood trusses for simple home additions. They switch to steel when spans exceed 30 feet or when space for thick members is tight.
Advantages and Disadvantages of Parallel Chord Trusses
Before you choose a parallel chord truss for your next roof, you may wonder if its benefits outweigh the extra effort. Let’s look at what makes this design shine and where it can slow you down.
Advantages
- Wide Clear Spans: Covers large areas without the need for internal supports.
- Flat Underside: Gives you open space for plumbing, wiring, and ductwork.
- Material Efficiency: Often uses less timber or steel than common trusses for the same span.
- Hidden Storage: Leaves room above the bottom chord for a lightweight storage loft or mechanical equipment.
Disadvantages
- Higher Fabrication Costs: Precision cuts and plate placement drive up manufacturing expenses.
- Depth Requirements: Longer spans need deeper trusses, which can affect overall building height.
- Maintenance Access: Inspecting web connections may mean removing ceiling panels.
- Design Complexity: Balancing load paths demands careful engineering and layout.
Note: You can add a small ceiling hatch now so you can check those joints later without cutting through drywall.
Load Capacity and Span Chart
Reading a span chart helps you pick the right truss depth and material for your roof load. Charts list maximum spans based on chord depth, web pattern, and material type.
For example, a 12‑inch wood parallel chord truss might span up to 20 ft under a live load of 30psf, while a similar steel truss can reach beyond 30 ft.
| Chord Depth | Max Span (Wood, 30psf) | Max Span (Steel, 30psf) |
| 8 in | 15 ft | 22 ft |
| 12 in | 20 ft | 30 ft |
| 16 in | 25 ft | 40 ft |
Use trusted data like the USDA Forest Products Laboratory’s span tables to verify your selection and ensure your design meets building codes and performance needs. Always factor in snow, wind, and live loads in your region for accurate sizing.
Cost Comparison of Roof Truss Systems
When you stack up parallel chord trusses against common trusses and attic trusses, material and labor costs tell different stories.
Steel parallel chord truss
A 30-foot steel parallel chord truss typically costs between $150 and $700 per truss, or about $5 to $23 per linear foot.
Material sourcing: Contact a local truss fabricator who works with MiTek-designed connectors or BlueScope steel. They will cut, assemble, and deliver exactly what you need.
Wood parallel chord truss
Wood trusses of the same span typically cost 20 percent to 30 percent less in raw materials. After adding connector plates and labor, expect $2.50 to $5 per square foot of truss area.
Material sourcing: Contact your nearest certified truss fabricator or lumber yard. Many provide custom sizing and delivery. Please note that custom orders typically require a lead time of four to six weeks.
Common vs attic trusses
- Common truss: Often $1.50 to $4.50 per square foot, but results in sloped ceilings and bulky webs.
- Attic truss: $3 to $6 per square foot, since it includes engineered joists for the living space above.
Material sourcing: Look for regional truss shops that specialize in attic trusses or reach out to national kit suppliers; they’ll handle custom sizing and delivery.
Warning: Hidden site prep costs like crane rental, scaffolding, and permit fees can add 10 percent to 15 percent to your total budget
By comparing these numbers, you can see that parallel chord trusses sit in the middle at cost but save on downstream HVAC and wiring work because of the clear underside.
Step by Step: How to Build a Parallel Chord Truss
Ready to build your own parallel chord truss? With clear steps from design to installation, you’ll end up with a strong structure that carries heavy loads and fits your span.
Step 1: Planning and design
Begin by measuring how wide the truss needs to span and estimating the weight it must support. Then plug those figures into a truss calculator or check a span chart to pick the right chord depth and member sizes.
Sketch a simple drawing that shows the top chord, the bottom chord, the web pattern, and the bearing points. Clearly label every dimension so there is no guesswork when you cut wood.
Tip: Before you sketch, gather your live and dead load numbers in a simple spreadsheet. That way, any changes update all your calculations at once.
Step 2: Laying out your chords
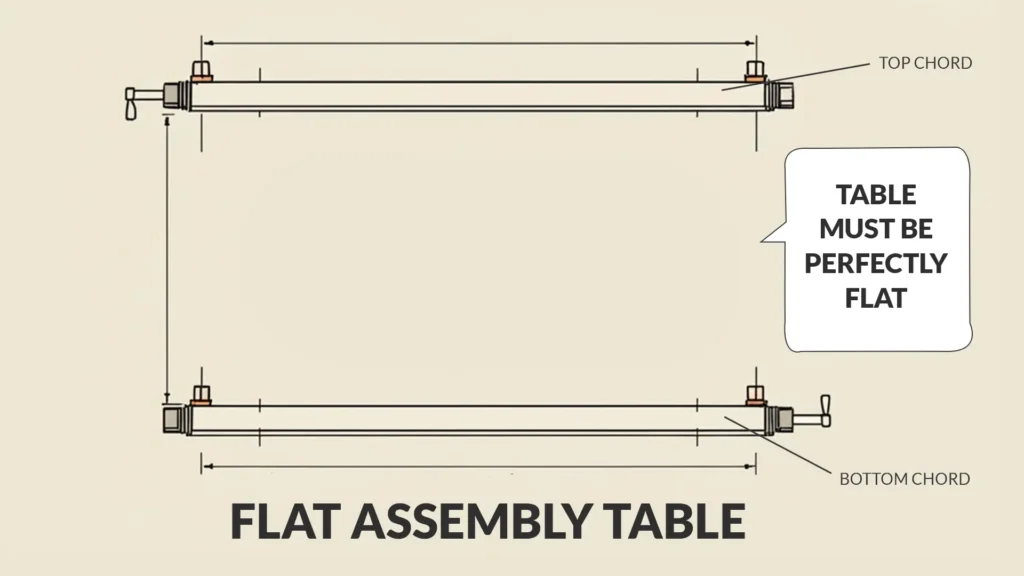
Once your plan is ready, you can mark and lay out the top and bottom chords on a flat assembly surface.
Use a straightedge or chalk line to keep both chords perfectly parallel as you draw cut lines. Including any overhang or support length in these marks will prevent last-minute surprises on site.
Note: Make sure your assembly surface is perfectly flat; any twist in your table shows up as a bend in the finished truss.
Step 3: Cutting and notching chords
With chords laid out, you clamp each board firmly and cut to length using a circular or miter saw. Immediately label each piece so nothing gets mixed up.
Next, you notch or bevel the ends for bearing seats or plate seating, following the angles in your sketch.
Smooth, accurate cuts are critical because they allow connector plates to sit flush and transfer forces correctly.
Tip: Always wear eye and ear protection, and clamp every board before you cut. A single slip can ruin your layout.
Step 4: Assemble and join the connector plates
After cutting, you arrange the top and bottom chords on your work table, then place the web members in the pattern you sketched.
Center a metal connector plate at each joint and press or nail it in using a plate press or pneumatic nailer.
Proper plate placement locks the members together and gives your parallel chord truss its load-bearing power.
Insight: Press plates from the center out toward the edges. That seating pattern locks the wood fibers tightly and maximizes strength.
Step 5: Lifting and bracing on site

Before lifting your bolt or nail, temporarily brace across several assembled trusses on the ground. This keeps them square and prevents twisting during hoisting.
Use a crane or forklift to lift the first truss into position and secure it at its bearing points before moving on to the next.
Once all trusses are in place, install permanent lateral braces between top chords and bottom chords to prevent racking under live loads.
Never leave a single truss unbraced for more than a few moments, or a gust of wind could tip it.
Warning: Never leave a truss unbraced; even a short gust of wind can turn it into a sail. Brace as soon as it’s in position.
By following these steps, you will end up with a sturdy parallel chord truss that meets code requirements and stands up to real-world forces. Each phase from design through bracing is an opportunity to catch errors early and build with precision.
Common Pitfalls and How to Avoid Them
Even a small misstep in measuring or aligning can turn your sturdy truss into a shaky disaster. Spot these traps now and keep your build rock solid.
Measurement Errors
Action: Double‑check every chord length and cut angle before you make your first cut. Measure with a reliable tape measure, then verify with a carpenter’s square.
The impact of small mistakes: Even a tiny error at the chord can throw off the entire truss geometry, causing gaps, misfits, and weakened structure.
Tip: Lightly pencil your measurements and confirm them with a second tool before cutting.
Plate Misalignment
Action: Center each nail or bolt plate on its joint, ensuring equal overhang on the top and bottom chords. Clamp the chords together before fastening the plates.
What can go wrong: Off‑center plates compromise connection strength and shift load paths, reducing overall capacity. Misaligned plates may split the chord or introduce uneven stresses.
Material Selection Oversights
Action: Use the exact wood grade or steel gauge specified in your design. Never substitute lower‑grade lumber or thinner steel without recalculating loads.
Why this matters: Undersized materials can sag under live loads or fail inspections, undermining long‑term performance. Always compare your parallel chord truss dimensions with the manufacturer’s guidelines before ordering.
Insufficient On‑Site Bracing
Action: After positioning each truss, install temporary diagonal and cross braces until permanent roof sheathing is in place. Plan your bracing sequence in advance and keep extra lumber on hand.
Here’s the risk: Without proper bracing, wind or uneven loads can twist or topple a truss before it’s secured, leading to damage and project delays.
Ready to plan your entire roof framing project from design through permit? Head over to our Roof Truss Design Guide for step‑by‑step layouts, code‑compliance checklists, and fabrication timelines.
Conclusion
You now know how to build a parallel chord truss that delivers long, efficient spans and a clean underside ready for insulation or utilities. With careful planning, precise cuts, and solid on‑site bracing, your roof will stand strong for years to come.
For expert design support or a free quote on your next project, trust Structural Wood Corporation. Let us help you bring your vision to life—reach out today and get your build off on the right foot.
FAQs
Can I use a wood parallel chord truss for a flat roof?
Yes. Wood parallel chord trusses work well on flat roofs because their matching top and bottom chords distribute loads evenly and leave space for insulation or utilities.
What is the pitch of a parallel chord truss?
A true parallel chord truss has zero pitch between its top and bottom chords, creating a flat profile ideal for low‑slope or flat roof applications.
How do I calculate the load capacity of a parallel chord truss?
Consult a span chart for your chosen material and depth, then apply the recommended safety factors from engineering guidelines or your truss supplier.
What parallel chord truss dimensions do I need?
Determine your span and loading requirements, then use a parallel chord truss calculator or span chart to select the appropriate chord lengths and depth.
Is specialized equipment required for lifting and bracing on‑site?
No. You can install temporary diagonal and cross braces with standard lumber and clamps. For large spans, consider a small crane or lift for safety and precision.